

How to Set Up Back-in-Stock Alerts for Products With Multiple Variants
If you sell products with multiple variants — different sizes, colors, or materials — you've probably run into this problem: one variant sells out while others are still available. A shopper comes to your page, finds their size is gone, and leaves. That's a lost sale you could have recovered.
Back-in-stock alerts solve this. When set up correctly, they let shoppers sign up to be notified for the exact variant they want — not just the product in general. Here's how to set that up properly on Shopify.
Why Variants Change Everything
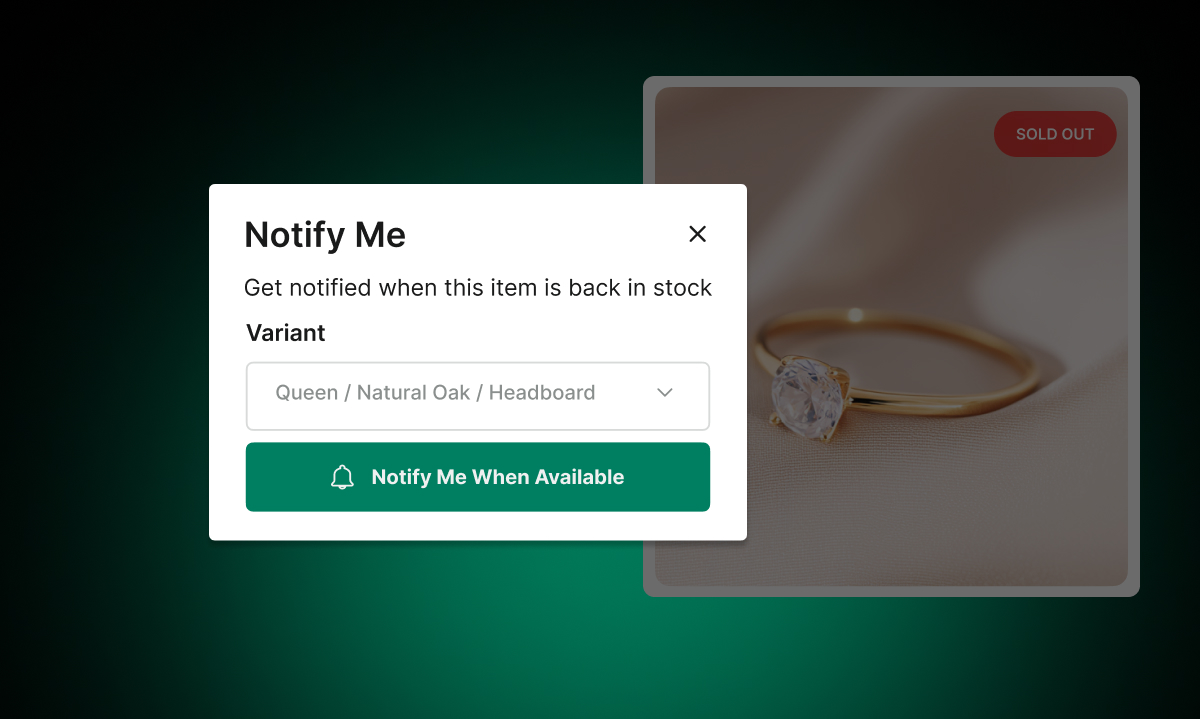
Most stores treat back-in-stock alerts as a product-level feature. But shoppers don't shop at the product level. They shop at the variant level. A customer who wants a blue ring in size 7 doesn't care that the red ring in size 9 is back. If your alerts don't work at the variant level, they won't convert.

This is why it matters to use a tool built for this. With Remind Notification, the "Notify Me When Available" button appears automatically when a specific variant is out of stock. When a shopper selects a sold-out size or color, the button appears — and their sign-up is tied to that exact variant.
Step 1: Install the Remind Notification app
To install the Remind Notification app to your Shopify store, follow these steps:
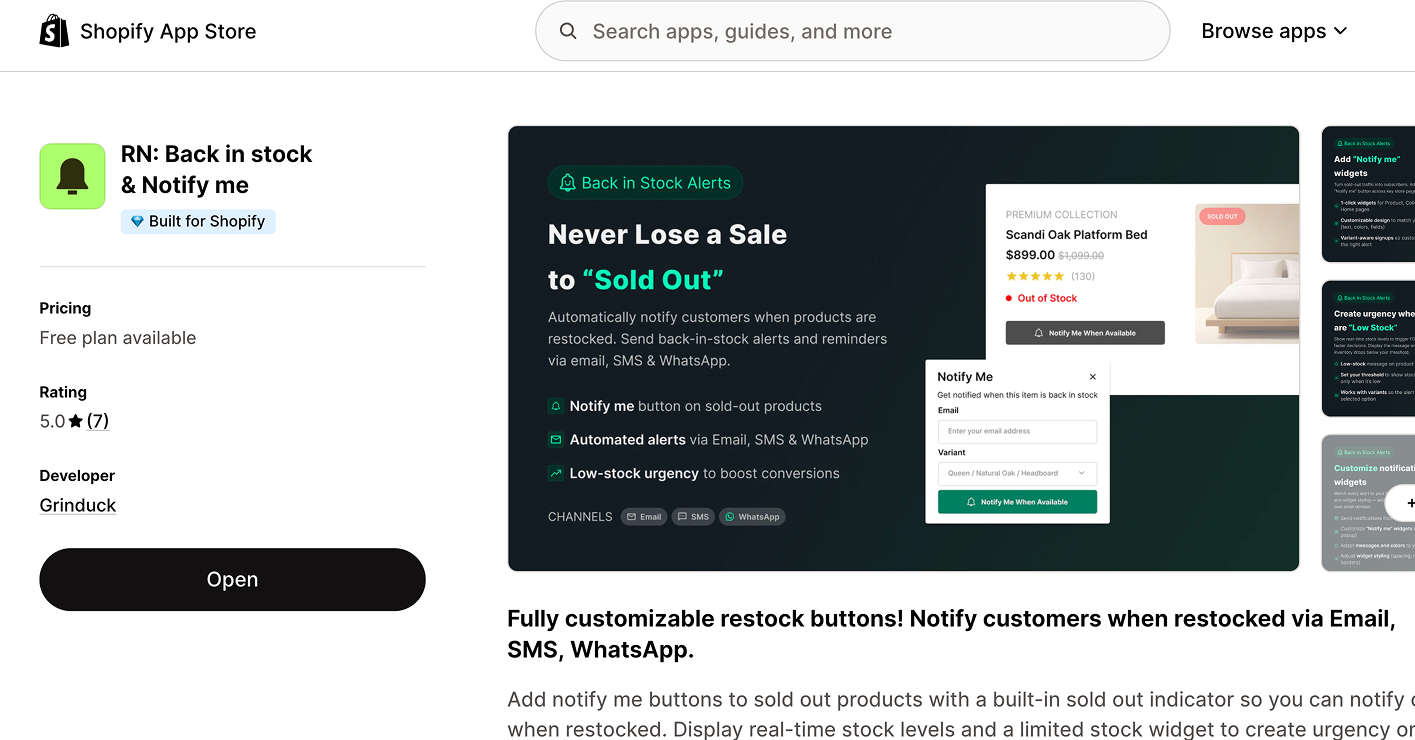
Go to the Shopify App Store and search for RN - Back Stock & Low Stock (or click here).
Click "Install" to open your Shopify dashboard.
You’ll be taken to the RN - Back Stock & Low Stock dashboard, where you should complete the onboarding.
Done! 🥳
Step 2: Enable the back in Stock Widget
After installing Remind Notification from the Shopify App Store, the Notify Me widget activates automatically during onboarding. If you've already installed the app and the widget isn't showing, you can re-enable it in two ways:
From your Dashboard — click the Enable button in the Back in stock widget section
From the Back in Stock tab in the left menu — click Enable from there
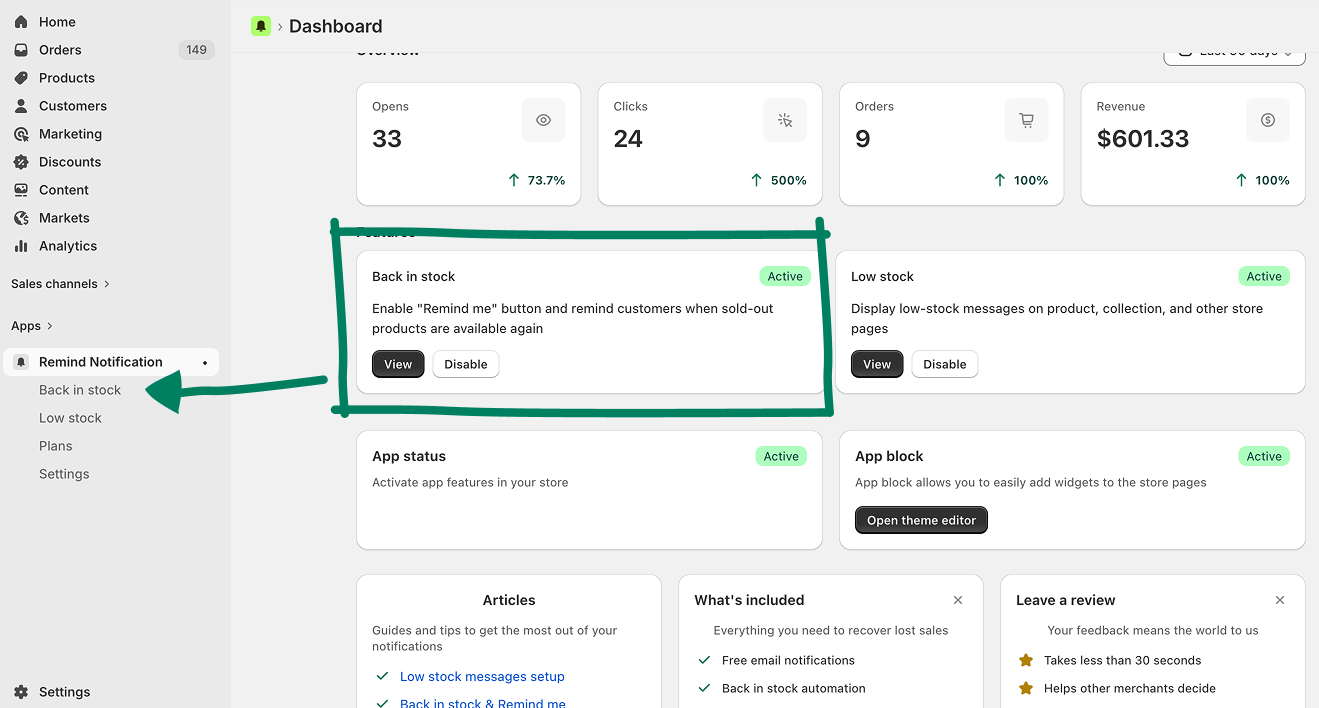
Once it's on, the button shows up on any variant with zero inventory. No manual setup is needed per variant.
You can find full instructions in the how to enable the Notify Me widget guide.
Step 3: Choose Where the Button Appears
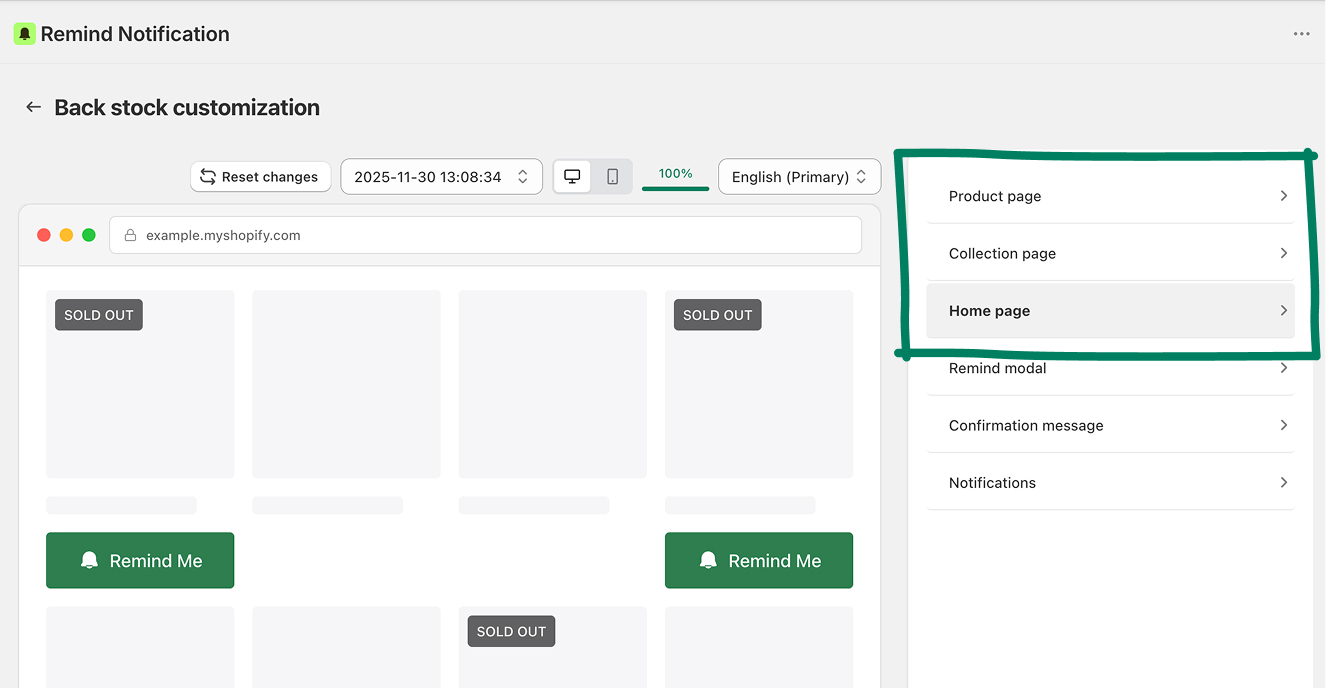
You can control which pages show the Notify Me button. The app lets you enable or disable it on:
Product pages — the most common placement, appears when a shopper selects a sold-out variant
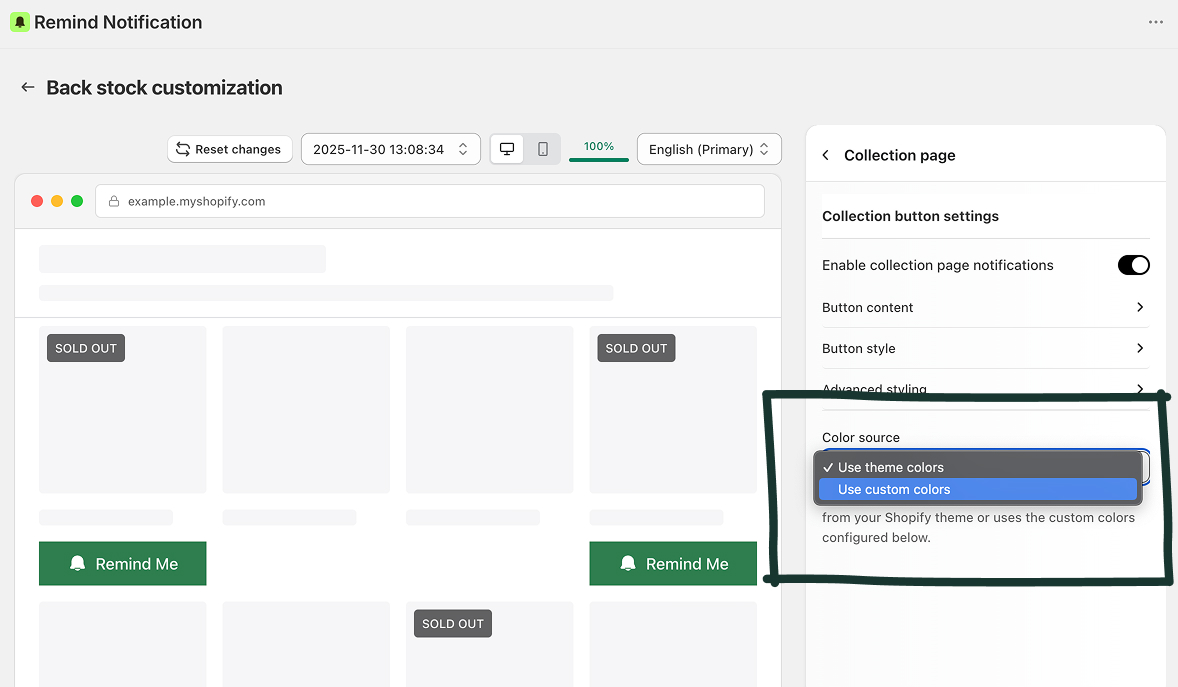
Collection pages — the button appears directly on sold-out products in your collections, so shoppers don't have to click through to sign up
Home page — useful if you feature products in homepage sections

To manage these settings, go to Back in Stock → Customize in the app, then select the page type you want to configure and toggle it on or off.
Showing the button on collection pages is worth doing. Shoppers often scroll through collections without clicking into individual products. Giving them a way to sign up right there reduces friction.

See the full guide on enabling the widget by page type for step-by-step screenshots.
Step 4: Customize the Button for Your Store
The default button text is "Notify Me When Available" — but you can change it to fit your brand. You can also customize:
Button color and style
The sign-up modal that appears after a shopper clicks
The confirmation message they see after subscribing
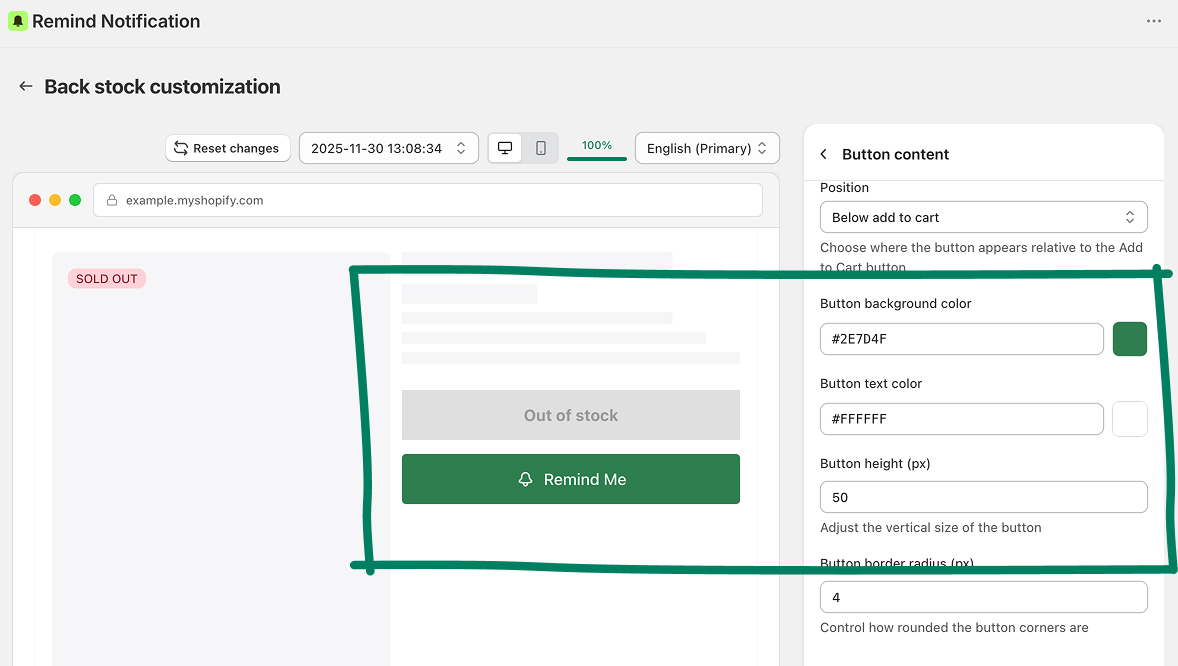
Small changes here matter. A button that looks native to your store gets more clicks than one that looks generic.
You can edit all of this in the Back in Stock → Customize section of the app:
click any section you want to edit
this will take you to the related customization options
here, you can decide whether you want to use custom colors or the colors used in your theme
Step 5: Do Nothing: Let the Emails Do the Work
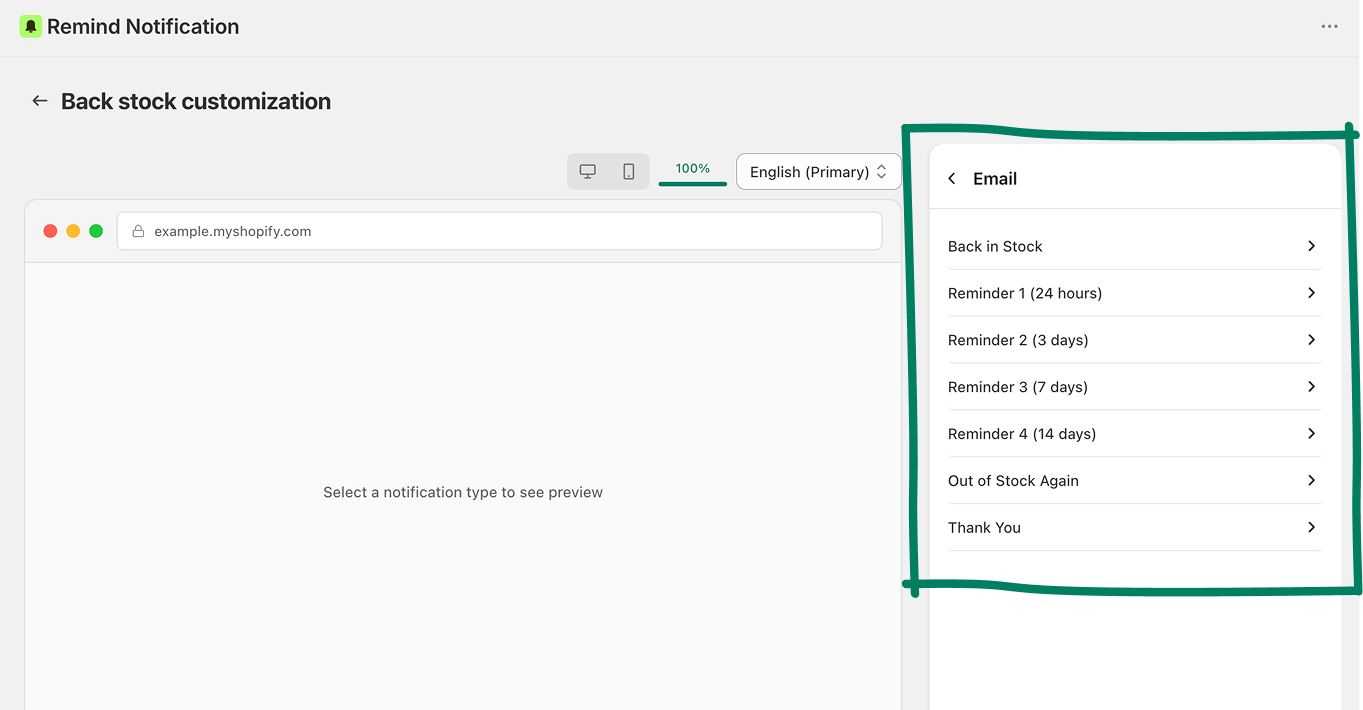
Once a shopper signs up for a variant alert, everything else is automatic. When that specific variant is restocked, the system sends a back-in-stock email to everyone who signed up for it.
After the first email goes out, Remind Notification also sends follow-up reminder emails for subscribers who didn't buy right away:
24 hours after the restock email
3 days later
7 days later
14 days later
You can enable or disable each of these, and customize the content for each one. This sequence is important for multi-variant products because shoppers often need a second or third nudge — especially for higher-priced items.
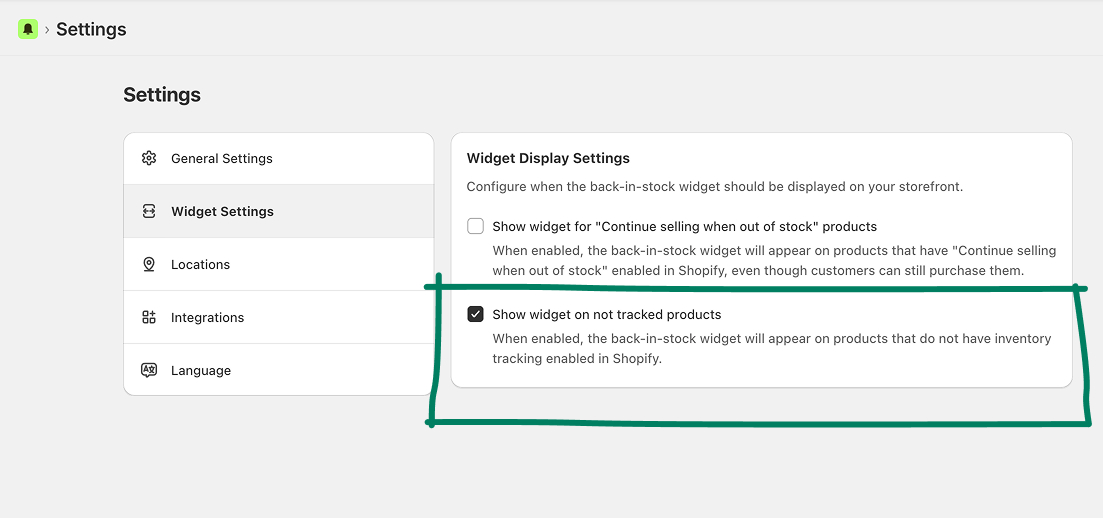
One Thing to Check: Inventory Tracking
The Notify Me button only shows when a variant has zero inventory and inventory tracking is enabled in Shopify. If a variant shows as unavailable but inventory tracking is turned off, the button won't appear by default.
In Widget Settings, you'll find an option called "Show widget on not tracked products." You can turn this on if you want the button to appear for untracked variants too.
What to Expect After Setting Up Back-in-Stock Alerts for Products With Multiple Variants?
Once everything is configured, the process runs on its own. Shoppers sign up. You restock. The emails go out automatically. You can track which variants have the most requests and which ones are converting in the app's reporting dashboard — useful data for your next buying decision.
Setting up variant-level alerts takes about 3 minutes. The revenue it recovers can be significant, especially for stores where a handful of sizes or colors drive the majority of sales.